|
|
 |
|
|
|
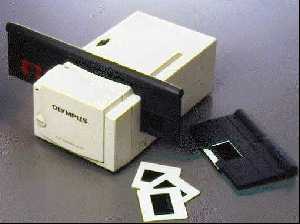
Until recently, anyone wanting a slide or negative scanned, either had to
send their work away to have it scanned professionally, or struggled with
the poor resolution of a flat bed scanner and an expensive slide attachment.
Neither of these solutions were
ideal. The price of 'domestic' grade film scanners have gradually dropped, it is now possible to buy a 1770 dpi, 35mm film scanner for 199 UK pounds including vat. This is for the parallel port version of the Olympus ES-10 scanner. Jessops stores across the country stock these scanners (early December 1998). Specifications
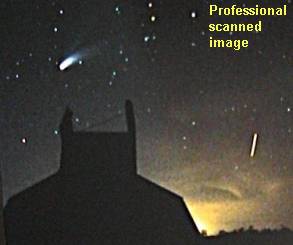
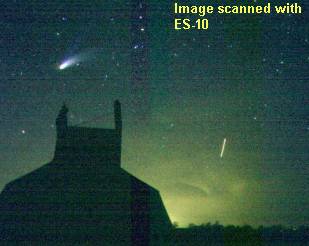
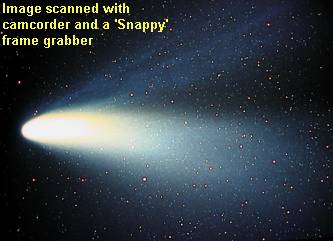
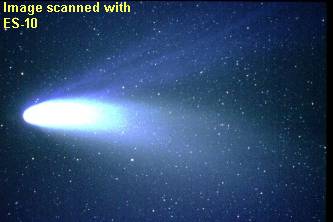
Resolution 1,770dpi (2400x1600 on 35mm, 1910x1090 on APS*) Using the scanner... Firstly, forget the idea of using the 1770 dpi maximum resolution of the scanner, your files will be around 20MB for each scan and take 5 minutes per slide to scan! In common with flat bed scanners, you soon realise that maximum resolution takes ages and leads to nothing more than wasted hard disk space. For most purposes images suitable to post on the internet or to print post card size won't require a file size bigger than 2MB to start with, compressing the files to 'JPG' format will reduce their size by a factor of 10 or so. Users will be happy about the ES-10's easy setup and installation. It takes less than 10 minutes from opening the box to scanning a slide. You simply connect the ES-10 to your printer port, then connect your printer to the through connection. Software installation took just a minute or two. Once the scanner is installed, pop a slide into the slide holder, and drop the holder into the slot. Then open the Olympus scanning software, and press the Preview button. In a few seconds, your image appears in the window. There, you can make a number of adjustments to your image: rotate it; view it in monochrome; or adjust its color balance, exposure, focus, and gamma curve. You can also crop the image, choose its size from a drop-down menu of preset sizes (up to 2,400-by-1,600 pixels), or adjust the scanner's resolution. The menu options include a wide choice of negative film types, choosing the correct one takes a big difference to colour balance. The choices are: Agfa, Fuji, Kodak Gold, Kodak (Others), Konica and "Others" The scanner copes well with under exposed negatives but fares less well with under exposed slides (especially astronomical slides). This isn't unreasonable as the amount of light needed to shine through a dark slide can be considerable. Compare the results from a professionally scanned slide with one from the ES-10. Even images taken with my 'Snappy' frame grabber with a domestic camcorder, don't look too bad by comparison. There are some banding problems with the image on the top right, also the background 'noise' is a rather ugly green colour.
These images have been scales slightly smaller than full size to keep the page width reasonable. To view slightly larger, right click your mouse over an image to view it. The scanner performs quite well with negatives, but slides seem to lack illumination and produce noise in the image. It isn't possible to recommend the ES-10 for astronomical use, the above images speak for themselves.
|
||||||