|
|
 |
|
|
|
Building an Observatory
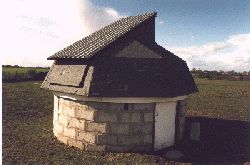
Having tried (and failed) to build a successful 8 foot diameter dome, I realised there had to be a better way. Looking for inspiration, I bought the book "How to Build your own Observatory" Reprints from Telescope Making Magazine, third edition. published by Kalmbach Publishing, ISBN 0-913135-06-2 . The observatory shown in the accompanying images is based on the design by Tom Dey with the exception of a stronger wall made of solid concrete blocks rather than his plywood one, and corrugated steel sheet rather than translucent plastic or fibre glass for the roof doors (I'm not convinced about the long term reliability of plastics and fibre glass). The overall diameter is 12 feet with a roof slot 5 foot wide by 10 long, so there's no need to keep moving the roof while observing.
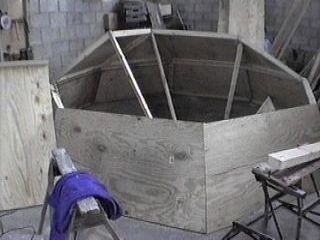
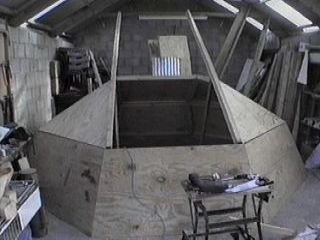
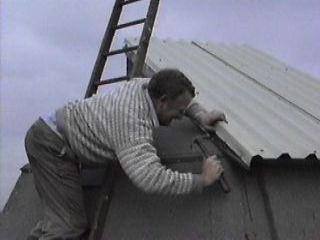
The actual construction is well covered in the book, so I won't go over common ground here, except to point out one or two points which will probably give some concern. Firstly you really do need a decent hand held circular saw, a 7 inch blade and 1100 Watt motor is the minimum. Screw cutting and welding facilities are also needed. Access to a surveyors level (that's what you see on a tripod at construction sites) is useful and enables the wall top track to be levelled to around 1/8th of an inch relative to any point on the track. The concrete block wall is topped with a cement layer which was originally coated with epoxy resin for the truck wheels to run on, the resin reduced damage to the cement by the nylon wheels and also kept friction to a minimum. This change from a plywood wall to a concrete one was considered necessary both from a climate point of view and also for increased security. The construction of the roof panels requires good weather or a large shed in order to pre-assemble them, it helps to build a small balsa wood model and to number the panels for assembly on site The 'missing' angle of the lower panel edges is 53 degrees, that's the angle each panel edge needs in order to give a gap free joint to it's neighbour, no I'm not a genius at mathematics, just good at trial and error! The panels were treated with preservative then heavy duty roofing felt glued on with molten pitch. These jobs are best done prior to final assembly with the panels flat on the ground.
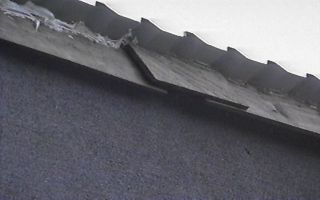
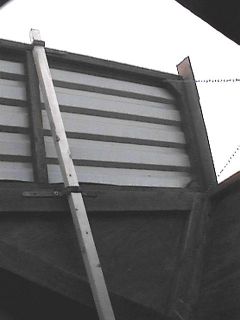
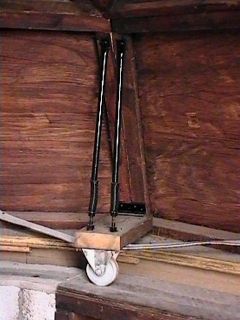
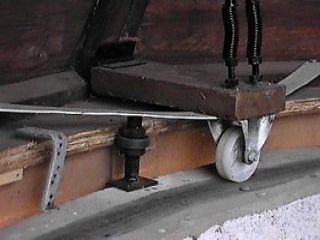
Despite it's considerable weight, the roof is reasonably easy to turn, the eight wheels on their home made suspension units probably help by keeping all the wheels in contact with the track. The whole assembly is kept from falling off by four roller bearings running against a plywood ring, there are also four steel straps to prevent wind lifting the roof off. While it might not be an ideal solution, holding the roof doors open with 2 x 2 timber is easy to achieve! The hinges are made water tight with strips of rubber fish pond liner, the rear of the roof doors have a couple of strips of plywood that overlap to keep rain from behind entering the observatory. The whole assembly has stood the wet English weather since 1993 with only a re-painting of the skirt and door being necessary. In 2004 we gave up with epoxy resin on the track, having seen floor tiles used successfully at the COAA observatories we spent a quite modest amount on a few boxes of floor tiles, the whole job only took around an hour to add the tiles and a further hour to grout them. Fingers crossed they should provide a relatively wear resistant track for a few more years.
|
||||||||||